Toilet brush storage needs to solve three everyday problems: keeping the brush within reach, containing drips, and leaving enough room to clean around the toilet. A holder that looks discreet can still be awkward if its lid hits the toilet tank or its base traps dirt against the wall.
The best setup depends on the space you actually have. A compact floor holder suits many bathrooms, while a properly installed wall holder can free a narrow cleaning path. Before buying anything, check how the brush lifts out, how the holder comes apart, and whether you can reach the surrounding floor comfortably.
These seven ideas focus on practical placement rather than hiding the brush at any cost. Start with the layout that fits your room, then use the measurement and maintenance checks to make it work.
Table of Contents
Plan Your Toilet Brush Storage Before Choosing a Holder
Look at the space beside the toilet from both a standing and seated position. Note the door swing, waste bin, water supply valve, pipes and any radiator or floor vent. A spot that looks empty in a photograph may be needed for your feet or for maintenance access.
Then check three things:
- Removal space: You should be able to lift the handle without scraping a wall, shelf or toilet tank.
- Drip control: The brush should return to a holder intended for that purpose, with a base or tray that contains drips.
- Cleaning access: You should be able to move or remove the holder and wipe the surface beneath it.
Do not assume a covered canister has a useful drying design. Inspect its construction and care instructions. For example, OXO describes its Compact Toilet Brush & Canister as having a built-in drip tray that catches water and allows it to evaporate. That is a specific product feature, not a promise that every enclosed holder works the same way.
1. Place a Compact Floor Holder Beside the Toilet
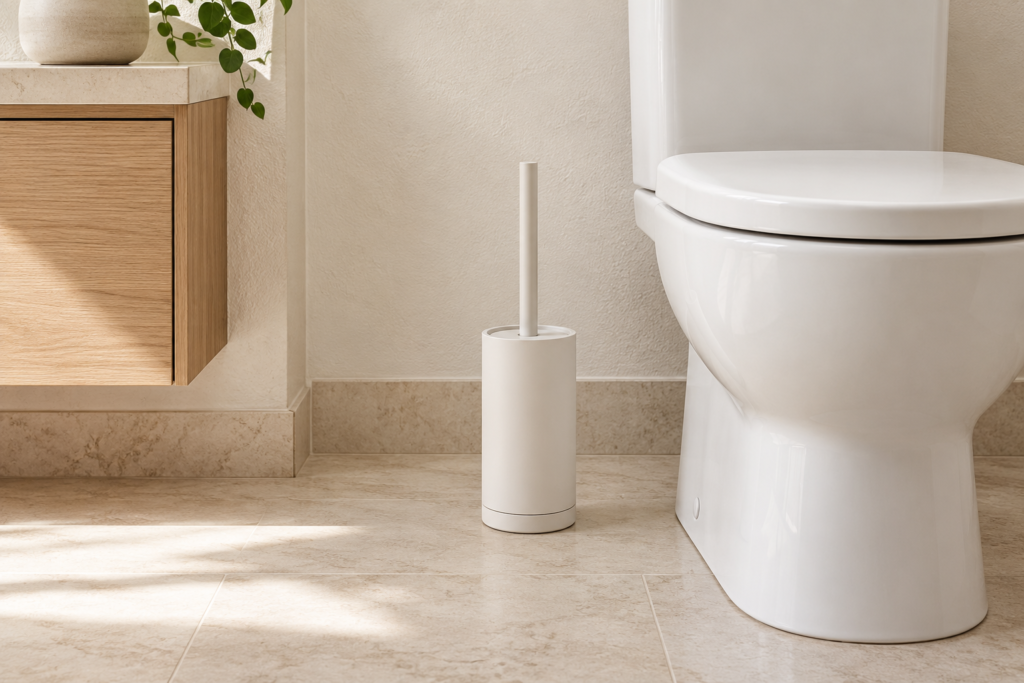
A freestanding holder is the simplest starting point when you have a reachable patch of floor beside the bowl. It requires no wall installation and can move easily when you mop.
Choose a stable base that does not tip or slide when the brush is removed. Position it far enough from the toilet and wall that you can lift the handle naturally. Leave the water supply valve accessible rather than pushing the holder directly in front of it.
Try the location with your existing brush before replacing the set. If you need to bend around the tank or pull the handle at an awkward angle, move it slightly forward. The ideal position is reachable without sitting in the main walking path.
Best for: A straightforward bathroom layout with a little open floor space.
Check first: Whether the holder stays stable during a normal one-handed lift.
2. Use a Purpose-Built Wall Holder to Clear the Floor
Wall-mounted toilet brush storage can help when the gap beside the toilet is narrow or the floor is difficult to mop. A holder suspended above the floor leaves the cleaning path open, provided the mounting position does not obstruct another fitting.
Choose a complete brush-and-holder system designed for wall mounting. A generic hook does not provide the same drip containment or stable support. Check whether the holder cup or tray can detach for cleaning without dismantling the wall bracket.
Before installing it, hold the unit in the proposed position and practise lifting the brush. Follow the manufacturer’s surface, fixing and load instructions. Confirm the wall construction and concealed services before drilling; ask an appropriate installer if the location is uncertain.
Best for: Small bathrooms where floor access matters more than moveable storage.
Check first: Detachable parts, handle clearance and suitable wall fixings.
3. Consider an Adhesive Holder for a Rental Bathroom
An adhesive-mounted holder may suit a bathroom where drilling is restricted. It can offer a similar floor-clearing layout, but only when the product is compatible with the surface and the installation is permitted.
Check the stated surface requirements carefully. Textured tile, peeling paint, uneven grout lines and damaged finishes can make a proposed location unsuitable. Follow the supplied preparation and curing instructions, and do not load the holder early simply because it appears attached.
The full holder must remain secure as the brush is lifted and replaced. If the bracket shifts during use, stop using it in that location. In a rental, also check how the adhesive is removed and whether the landlord permits the installation.
Best for: A suitable smooth surface where an approved removable installation is wanted.
Check first: Surface compatibility, curing time and removal instructions.
4. Fit a Slim Holder Into a Usable Side Gap
Some bathrooms have a narrow strip between the toilet and vanity. A slim holder can use this space without adding a bulky object to the room, but the gap needs to accommodate more than the base dimensions.
Measure the width at the tightest point, including skirting, pipework and any curved section of the toilet. Check the holder’s widest part and the space needed for its lid or handle movement. A unit that fits tightly may still be difficult to remove.
Keep it near the accessible end of the gap rather than burying it behind the toilet. You should be able to lift the whole holder out to clean beneath it. If the position requires squeezing your hand between fittings, use a different location.
Best for: A narrow but accessible gap beside a vanity or toilet.
Check first: Whole-unit removal, not just whether the base fits.
5. Choose a Corner Position Without Blocking Access
A corner behind or beside the toilet can make a holder less noticeable while keeping it close to its working area. This is useful when the room’s doorway faces the toilet directly.
Check the corner with the bathroom door fully open and the bin in its usual place. Keep the holder clear of water supply fittings and leave room to wipe the adjoining walls and floor. A corner location should reduce visual clutter without creating a difficult cleaning pocket.
If the brush can only be retrieved by reaching behind the tank, the placement is too concealed. Move it to the side, or choose a narrower unit with easier access.
Best for: Bathrooms with an accessible corner outside the door swing.
Check first: Reach, cleaning access and unobstructed plumbing fittings.
6. Give a Brush and Plunger Separate Compartments
A combined floor stand can keep a toilet brush and plunger in one defined zone. It may be useful when two separate holders spread across the floor, although a combination unit is not automatically smaller.
Compare the total footprint with the space you have. Look for individual receiving compartments so one tool can be lifted without dragging across the other. Check whether each tray can be removed and cleaned independently.
Avoid filling the remaining space with cleaner bottles, cloths or spare toilet paper. A tool stand works best when it stores the tools it was designed to hold. For chemicals and other equipment, use a separate system such as these bathroom cleaning supply storage ideas.
Best for: A bathroom that needs both tools in one accessible location.
Check first: The complete footprint and separate tray access.
7. Use a Discreet Canister With Accessible Removable Parts
A covered canister can suit a guest bathroom where you want a quieter visual finish. Choose a holder that conceals the brush head while still being easy to open, empty and clean.
Inspect how the cover operates. It should not need to be held open with one hand while you remove the brush with the other. Check whether the base detaches and whether any drying or ventilation features are described in the product instructions.
Keep the canister in a reachable location rather than placing it inside an ordinary decorative basket. Fabric, woven materials and decorative containers can complicate drip management. A dedicated holder should do the practical work; its finish can provide the visual match.
Best for: Guest bathrooms where a simple, discreet appearance is preferred.
Check first: Lid operation, removable base and stated care instructions.
Compare the Storage Options
Scroll sideways to read the full table.
| Option | Main advantage | Main trade-off |
|---|---|---|
| Compact floor holder | Easy to move for cleaning | Uses floor space |
| Fixed wall holder | Keeps the floor open | Requires suitable installation |
| Adhesive wall holder | May avoid drilling | Depends on surface and installation requirements |
| Slim side-gap holder | Uses an awkward narrow area | Can be difficult to remove if fitted too tightly |
| Corner placement | Reduces visual prominence | Must remain reachable |
| Combined brush-and-plunger stand | Defines one tool zone | May have a larger footprint |
| Covered canister | Conceals the brush head | Care and drying design vary |
Measure the Footprint and the Removal Path
Mark the proposed holder footprint with a piece of paper before purchasing. Include projections such as a lid, bracket or wide handle support. Open the bathroom door, move around the toilet and check that the marked area is outside your normal foot space.
For a floor holder, practise lifting an object of similar height from the position. For a wall holder, check the upward movement needed to remove the brush. Product height alone does not describe the entire removal path.
Finally, plan how you will clean the holder. If the tray cannot detach or the whole unit cannot move, its neat appearance may come with inconvenient maintenance. For wider layout changes, see our small bathroom storage ideas.
Keep the Holder Easy to Maintain
Follow the brush and holder manufacturer’s care guidance, along with the instructions on any cleaning product you use. Build inspection of the holder into your normal toilet-cleaning routine, and clean it sooner if you notice residue or collected liquid.
Check the receiving cup, underside of the base and nearby surface rather than cleaning only the handle. Replace damaged components that no longer support the brush or contain drips properly. A wall bracket should also remain secure during use.
Keep this dedicated toilet-cleaning tool separate from towels, toothbrushes, cosmetics and clean cloths. Avoid using an ordinary vanity shelf or shared toiletries drawer as its storage location. If you are reorganizing that area, these under-sink bathroom storage ideas can help you give other categories their own places.
Frequently Asked Questions
Where should a toilet brush be stored in a small bathroom?
Choose a reachable spot near the toilet where the holder contains drips and can be cleaned easily. A compact floor holder or suitable wall-mounted system often fits better than a bulky decorative stand. Keep doors, walking space and plumbing access clear.
Is wall-mounted storage better than a floor holder?
It depends on the room. Wall mounting can free the floor for mopping, while a floor holder is easier to move and requires no installation. Compare the brush-removal path and the holder’s cleaning access before choosing.
Can a toilet brush be hidden inside a cabinet?
Avoid putting a used brush into an ordinary toiletries cabinet just to hide it. It needs its own suitable holder and a layout that manages drips and permits maintenance. A discreet dedicated canister near the toilet is often a simpler solution.
Does a covered holder remove the need for cleaning?
No. A cover changes the appearance, but the receiving cup and base still need care. Follow the product instructions and inspect the holder as part of your cleaning routine.
Final Thoughts
Practical toilet brush storage starts with access, drip containment and easy maintenance. A small holder in a sensible position usually works better than a larger unit squeezed into a hidden gap.
Choose one layout, test the footprint and handle movement, and check how the holder comes apart. When the brush is easy to reach and the surrounding surfaces remain accessible, the setup becomes easier to maintain without adding unnecessary bathroom clutter.