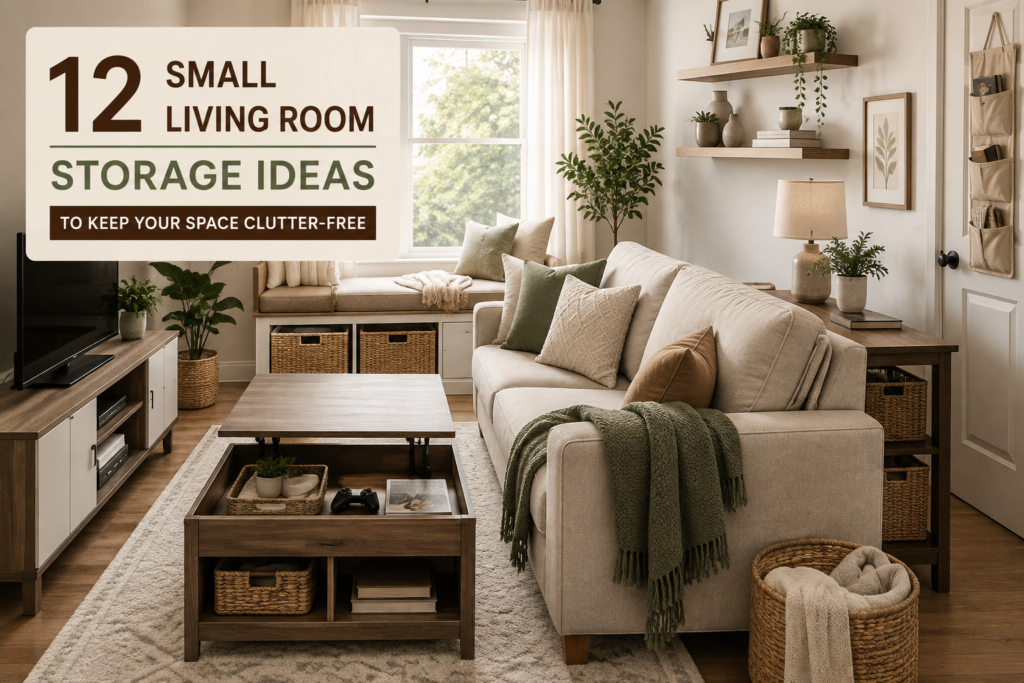
Crafting in the living room is convenient until the scissors disappear under a cushion and an unfinished project takes over the coffee table. You need somewhere to keep your materials, but the room still has to work for relaxing, watching television and spending time together.
Good living room craft supply storage starts with the way you actually work. A person who knits beside the sofa needs a different setup from someone who spreads paper, stamps and glue across a table. The most useful arrangement keeps your current project easy to reach and gives everything a clear place to return afterward.
These eight ideas help you organize a shared living room without turning every shelf into a craft display. Start with one suitable drawer, basket or cabinet section, then add storage only where your supplies need it.
Table of Contents
Plan Your Living Room Craft Supply Storage
Before buying containers, gather the materials that regularly end up in this room. Include unfinished projects, loose tools and the extra packets tucked behind books. Seeing the collection together makes it easier to choose storage that fits.
Sort your supplies into three groups:
- Daily tools: the scissors, hooks, pencils or brushes you reach for during most sessions.
- Current projects: materials already selected for something you are making.
- Refills and occasional supplies: spare yarn, unopened paper packs and tools used less often.
Next, choose your usual working spot. If you craft from an armchair, a portable basket may be enough. If you need a table, plan a clear route between that surface and your storage. Carrying one tray is easier than making several trips with loose materials.
Measure the storage opening as well as the space inside. Cabinet hinges, drawer sides and shelf supports can prevent a container from sliding out even when its advertised dimensions appear suitable. Allow room for handles and lids, and check whether you can remove the container without moving furniture.
Choose Storage That Matches Your Supplies
Scroll sideways to read the full table.
| Main supplies | Useful storage option | What to check first |
|---|---|---|
| Pens, scissors and tape | Divided drawer | Drawer height and the length of your largest tool |
| Several types of frequently used materials | Rolling cart | Parking space, shelf capacity and the route to your work surface |
| Yarn and a knitting or crochet project | Carry basket with a separate tool pouch | Smooth interior and enough room for the unfinished piece |
| Cardstock and scrapbook paper | Flat paper box or shallow shelf tray | Internal dimensions that fit your largest sheets |
| An unfinished tabletop project | Project tray | A stable shelf where the tray can stay level |
| Beads, buttons and other tiny pieces | Compartment box | Secure closure and dividers that prevent pieces from mixing |
1. Create a Divided Craft Drawer
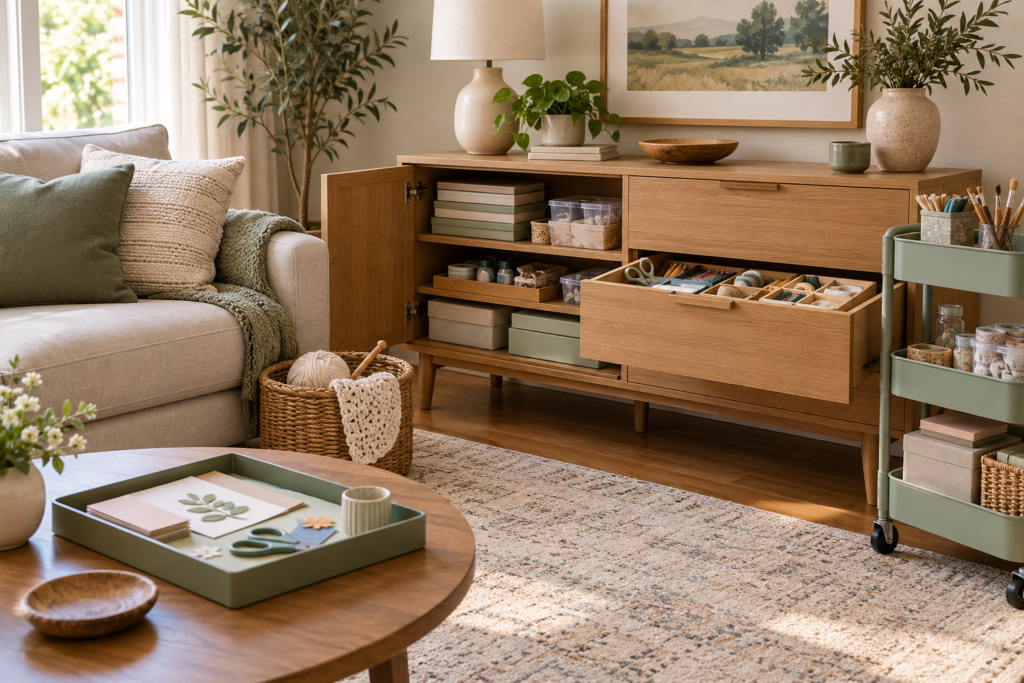
A drawer in a sideboard or occasional table can hold a compact craft kit without adding another piece of furniture. It works particularly well for small tools that become frustrating to find in a deep basket.
Arrange the drawer around the actual sizes of your supplies. Give scissors a long section, place tape and glue sticks in a wider compartment, and use a shallow tray for clips or erasers. You do not need identical dividers if a few sturdy containers already fit.
Keep frequently used tools toward the front. Place occasional items behind them, but avoid stacking containers over the tools you use every session. If you have to unpack the drawer to reach a pencil, the arrangement needs simplifying.
Try this before buying organizers: lay everything inside the empty drawer and test a few arrangements. Then measure the gaps you want to divide. This helps you avoid buying a matching set that wastes half the available space.
2. Give a Rolling Cart a Proper Parking Space
A rolling cart is useful when your supplies need to travel between a cabinet corner and a temporary work surface. Its biggest advantage is keeping several categories together while letting you move them in one trip.
Choose the parking location first. The cart should sit somewhere that allows cabinet doors to open and leaves a comfortable walking route. A narrow gap beside furniture is only useful if you can pull the cart out without shifting the sofa.
Give each shelf a job. For example, use the top for your active tool container, the middle for current materials and the bottom for heavier supply boxes. Keep loose small items inside containers so they do not fall through gaps or roll around as you move.
Check the manufacturer’s measurements, shelf loads and wheel features. For example, the IKEA RÅSKOG utility cart product page lists dimensions, load limits and lockable castors for that model. Check the exact version you are considering rather than assuming every similar cart has the same features.
Avoid turning the cart into overflow storage. If every shelf is packed above its edge, removing one supply becomes awkward. Keep enough room to lift containers out cleanly.
3. Keep One Soft Craft Project in a Carry Basket
A carry basket suits knitting, crochet and other projects with soft materials. It can sit beside your usual chair during a session and return to a shelf when you finish.
Choose a basket with a smooth interior, or add a suitable liner if the weave catches yarn. Check that the unfinished piece fits alongside its remaining materials; a basket that only holds the starting supplies may become too small halfway through the project.
Keep hooks, stitch markers and scissors in a separate pouch. That prevents small tools from sinking beneath yarn and makes the basket easier to empty when you want to change projects.
Limit this basket to one active project. Spare yarn and unrelated materials belong elsewhere. Otherwise, the basket gradually becomes a mixed collection that you have to search before every session.
If you store the basket on a bookcase, the ideas in our living room bookshelf organization guide can help you make room while keeping books and decorative pieces accessible.
4. Store Paper Flat in a Dedicated Shelf Section
Paper needs storage that matches its size. A box designed for ordinary documents may not fit larger scrapbook sheets, and pushing oversized paper into a smaller container bends the edges.
Measure your largest sheets before choosing a flat box or shallow tray. Check the internal dimensions, since thick walls and handles can reduce the usable space.
Separate full sheets from usable scraps. Keep scraps in one envelope or folder so you can check them before cutting another full sheet. Avoid saving every tiny offcut; choose a minimum size that is useful for the projects you make.
Use a few broad labels such as “plain card,” “patterned paper” and “scraps.” Very detailed sorting can take up more room than the paper itself, especially when each category contains only a few sheets.
Make the paper easy to remove. Do not place a heavy decorative object on top of a box you open regularly. A dedicated shelf slot is more convenient than a stack you must dismantle each time.
5. Use a Project Tray for Work in Progress
A project tray gives unfinished work a temporary home. It is useful for a card layout, embroidery kit or small assembly project that you want to pause without returning every component to its original container.
Choose a rigid tray with enough space for the project and a small margin around it. A raised edge helps contain loose tools, but tiny pieces should still go into a closing container before you carry the tray.
Decide where the loaded tray will rest before you start using it. It needs a stable shelf with enough clearance above the project. Avoid a location where the tray must tilt to fit through the opening.
A tray is a transport and staging space, not a permanent substitute for putting supplies away. Keep one active tray, then clear it when the project is finished.
For crafts involving glue or paint, follow the product’s drying instructions before moving or covering the work. Protect the table separately; a storage tray does not automatically provide a suitable surface for wet materials.
Our coffee table organization ideas offer additional ways to keep your shared surface usable between craft sessions.
6. Organize Small Parts in Secure Compartment Boxes
Beads, buttons, findings and similar pieces need containers that keep categories separate when moved. An open divider tray may look organized on a shelf but spill its contents when carried to the table.
Check how closely the lid meets the dividers. If there is a gap, tiny pieces may move between compartments even when the outer lid stays shut. Individually closing sections can be useful for particularly small materials.
Sort by the feature you use when choosing pieces. That might be size for buttons, finish for jewelry findings or color for beads. Avoid building a complicated system around details you rarely need.
Keep needles, blades and other sharp tools in suitable protective cases. Where children can access the room, use storage that prevents access to small parts and sharp tools; a lid or high shelf alone should not be treated as secure storage.
Leave room for your existing collection. Dividing one full compartment into six tiny sections is only helpful if each section holds a category you can easily identify.
7. Build a Concealed Craft Zone Inside a Cabinet
A closed cabinet works well when you want supplies nearby while keeping the room visually calm. Reserve one section for crafts instead of distributing materials across every available cupboard.
Use removable containers grouped by activity. A card-making box might contain stamps, ink pads and adhesive, while an embroidery pouch holds fabric, thread and its current pattern. Carry the relevant container to your work surface rather than collecting supplies from several shelves.
Place heavier containers on a suitable lower shelf and keep frequently used kits within comfortable reach. Follow the furniture manufacturer’s instructions, including any anchoring requirements.
Label the front of each container where you can read it with the cabinet open. If a label is hidden on top, you will have to pull out every box to identify it.
Before adding storage to a cabinet door, check the clearance carefully. Hinges, shelves and containers inside the cabinet may interfere with a door-mounted organizer. For other ways to use available vertical space, see our living room wall storage ideas.
8. Separate Everyday Supplies from Refill Stock
Extra materials can crowd out the tools you actually need. Keeping every unopened pack beside the sofa makes your working kit larger without making the next session easier.
Keep a practical working quantity in your living room craft zone and place refills in a clearly labeled secondary location. That might be another cabinet shelf or a suitable cupboard elsewhere in the home.
Use specific labels such as “card-making refills” or “spare yarn.” A box marked “miscellaneous” gives you little reason to check it before buying more.
Add a small inventory note inside the refill box if you regularly forget what you own. A simple list of paper sizes, yarn colors or adhesive types is enough; it does not need to become a detailed tracking project.
Set the container as your space limit. When it becomes difficult to close or remove, review duplicates and unused materials before adding another box. Storage stays manageable when its capacity matches the room you can reasonably give it.
An Example Layout for a Shared Living Room
Imagine a living room with a small sideboard, a coffee table and one armchair used for evening crochet. The following is an illustrative arrangement rather than a tested room layout:
- Sideboard drawer: scissors, tape, pencils and frequently used tools in shallow dividers.
- One cabinet shelf: a flat paper box and a removable card-making kit.
- Basket beside the armchair: the current crochet project with its tool pouch.
- A clear shelf slot: a project tray that can leave the coffee table between sessions.
- A separate cupboard: labeled refills and occasional supplies.
This arrangement gives each type of material a home without requiring all eight storage ideas. If you only crochet, the basket and a refill box may be enough. If you mainly work with paper, the flat box, tool drawer and project tray are more relevant.
The useful question is whether you can start and stop a session comfortably. Storage that looks attractive but requires several rounds of unpacking will be harder to maintain.
A Simple End-of-Session Reset
Finish each session by returning the room to its everyday use. A short sequence helps prevent an active project from spreading into several unfinished piles.
- Protect the project: place dry work on its tray or inside its project container.
- Close small-part containers: check lids before carrying them.
- Return shared tools: put scissors, tape and other essentials back in their assigned sections.
- Sort leftovers: return usable materials and discard scraps you will not use.
- Clear the working surface: return the basket, tray or cart to its home.
If one step repeatedly feels awkward, adjust that part of the setup. A box may be too heavy, a shelf may be too high, or the container may need two hands to open. Small changes can make the whole routine easier.
Frequently Asked Questions
How can I hide craft supplies in a small living room?
Start with existing closed storage, such as a sideboard drawer or cabinet shelf. Use removable containers for each activity and keep only your current project nearby. Measure the available space before buying bins so you can remove them easily.
Is a rolling cart or a cabinet better for craft storage?
A rolling cart suits supplies you move frequently between work areas, provided you have a clear parking space. A cabinet suits materials you want concealed between sessions. Choose based on access and available space rather than the number of supplies alone.
How should I store an unfinished craft project?
Use a dedicated tray, pouch or box that fits the project without bending or compressing it. Keep its selected materials together, close containers holding tiny pieces, and follow drying instructions for work involving glue or paint.
What should stay outside the everyday craft kit?
Keep bulk refills, rarely used tools and supplies for future projects in a separate labeled location. Follow storage instructions on paints, adhesives and other products rather than assuming any decorative basket or cabinet is suitable.
Make Crafting Easy to Start and Easy to Put Away
The best living room craft supply storage gives your hobby a clear place within a shared room. Keep daily tools accessible, protect materials according to their shape and size, and give unfinished work somewhere to rest between sessions.
Start with the storage problem that interrupts you most. That may be a missing pair of scissors, bent paper or a project covering the coffee table. Solve that specific problem first, then build a setup that makes both crafting and clearing up feel straightforward.