Your suitcase is unpacked, but the wash bag is still sitting on the bathroom counter. Half-used travel bottles, a damp soap case and several spare pouches can quickly become a small pile that never quite gets put away.
Good toiletry bag storage gives the bag a dry home between trips and keeps its contents easy to review. The aim is not to build a second collection of bathroom products. It is to separate what belongs in your everyday routine from the few items you want ready for travel.
This guide focuses on storing wash bags, travel pouches and their small accessories at home. It does not replace a full vanity organization system or an airline packing guide. Start by emptying the bag, following its cleaning instructions and allowing everything to dry before choosing a storage spot.
Table of Contents
Before You Store a Toiletry Bag
Empty every pocket, including the narrow zip section where small items collect. Put everyday toiletries back in their usual places, remove packaging you no longer need and check for leaks. A zipped bag can conceal a spill until your next trip.
Read the care label before washing the bag. Some linings can be wiped, while other materials need a different method. Follow the instructions for removable containers too, and let the bag, bottles and cases dry completely before closing or nesting them.
Review any products you intend to keep. Preserve their labels and follow their stated storage conditions and expiry information. Do not use this travel system for medicines that require their own storage arrangements. If a product needs cooler, drier conditions than your bathroom offers, keep it in a suitable location elsewhere.
Choose one of two approaches: store the bag empty, or keep a small kit of clearly identified travel essentials. An empty bag is easy to inspect and works well for infrequent trips. A maintained kit can suit regular travel, provided you review its contents before each departure.
Choose a Toiletry Bag Storage Location
A suitable spot is dry, accessible and large enough for the bag to come out without catching on a hinge or shelf edge. Keep it away from shower spray and routine sink splashes. A dry linen cupboard outside the bathroom may work better than a crowded vanity in a steamy room.
Scroll sideways to read the full table.
| Your situation | Useful option | Check first |
|---|---|---|
| One frequently used wash bag | Removable tray on a dry shelf | Bag and tray can slide out together |
| Flat or compact pouches | Dedicated drawer section | Drawer closes without pressing on zippers |
| Several structured bags | Upright shelf divider | Bags stand without bending their sides |
| Occasional family travel | Labeled travel bin | Each person can identify and remove their own kit |
| Loose refillable bottles | Separate small container | Containers are clean, dry and easy to inspect |
For broader cabinet planning, our under-sink bathroom storage ideas can help you allocate space to other categories. Avoid treating the travel bag as a convenient place for every loose item left over from that project.
1. Give the Bag a Removable Shelf Tray
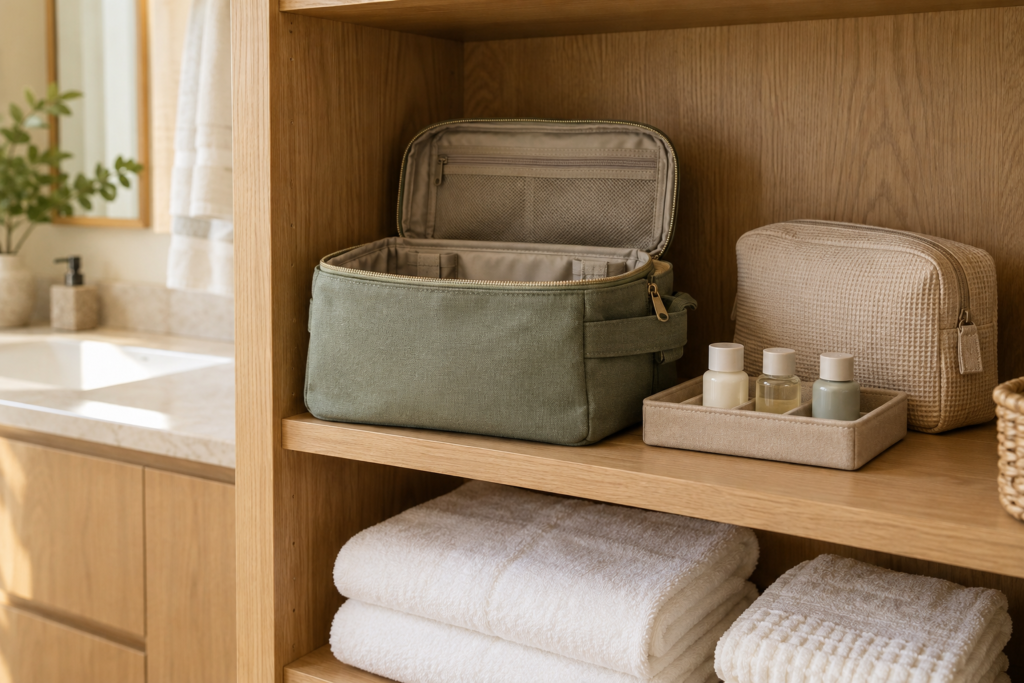
A shallow tray creates a clear parking space for a wash bag and its small accessories. It is especially useful on a deep shelf, where a pouch can otherwise disappear behind towels or spare supplies.
Choose a tray that supports the entire base of the bag. Leave enough room to grip its edge and pull it out without tipping anything. If the bag has a rigid handle, measure that projection as part of its footprint.
Keep the tray simple: the bag, a separate dry soap case and perhaps one small pouch. Bottles you use daily should stay with daily toiletries. Adding loose skincare products turns the tray into another bathroom organizer and makes packing less straightforward.
Best for: a regular traveler who wants to retrieve the whole kit in one movement. Skip the tray if your shelf is already shallow and the bag comes out easily on its own.
2. Create a Dedicated Travel Drawer Section
A drawer can hold a flat wash bag without leaving it on display. Reserve one defined section rather than letting travel items spread among cosmetics, brushes and everyday grooming tools.
Lay the empty bag in the drawer and close it gently before buying dividers. Raised seams, zip pulls and carrying loops can catch even when the main body appears to fit. Do not press the bag down to force the drawer shut.
Place a small accessory pouch beside it if needed. Put the zip opening toward you so you can inspect the contents without lifting everything out. Keep frequently used grooming items in a separate section with a clear boundary.
Our bathroom drawer organization guide covers the wider drawer layout. Here, the goal is simply to preserve one reliable space for your travel kit.
3. Stand Structured Bags in a Shelf Divider
Firm-sided toiletry bags sometimes store better upright than stacked. A divider can help each bag hold its place and lets you remove one without disturbing the rest.
Check that the bag naturally supports this position. If it slumps or folds across a seam, lay it flat instead. A divider should separate the bags rather than squeeze them into a narrow slot.
Turn a carrying loop or small label toward the shelf opening. This is useful when several bags have the same color but different capacities. Group them by use, such as a compact overnight bag and a larger checked-luggage kit.
Leave spare room above the bags for your hand. A shelf that matches the bag’s height exactly may still be awkward because you cannot grasp it comfortably.
4. Nest Empty Soft Pouches Without Crushing Them
If you own several flexible pouches, nesting can reduce the space they occupy. Use the largest empty bag as the outer container and place smaller dry pouches inside without forcing them past the zipper.
Keep the nesting shallow. One or two smaller bags are easier to find than a chain of pouches hidden inside one another. Leave structured cases separate if bending them changes their shape.
Never nest damp bags or leave spilled toiletries inside the outer pouch. Before closing the group, check that no small container or forgotten product remains in a pocket.
A useful limit: keep the sizes you actually use. If opening the outer bag reveals several identical spares that never travel, review the collection before buying a larger storage bin.
5. Fold a Hanging Wash Bag for Storage
A hanging wash bag is designed to unfold at your destination, but it does not have to remain hanging at home. Once it is clean and dry, fold it along its intended seams and secure the closure without overfilling its pockets.
Tuck the hook into its designated compartment if the design provides one. Otherwise, position it so it cannot scratch another bag or snag a towel. Avoid sharply bending the hook or stitching just to make the kit fit.
Store the folded bag flat or upright according to its construction. Do not hang a heavy filled kit from an untested adhesive hook. If you choose hanging storage, follow the support’s installation and weight guidance.
This option works particularly well when the bag has several transparent compartments: you can open it before a trip, review the contents, then fold it back into its assigned space.
6. Keep Empty Travel Bottles in Their Own Box
Loose refillable bottles are often the part of toiletry bag storage that creates the most searching. A small separate box keeps them visible and stops them rolling behind larger items.
Clean and dry reusable containers according to their instructions. Keep a bottle with its matching cap once everything is dry. Do not assume caps are interchangeable just because two bottles look alike.
Separate empty containers from filled products. Label filled bottles clearly, and use only containers suited to the product. Avoid combining old and new contents simply to use up leftovers.
Before flying, check the applicable security guidance for your departure and transfer airports. For US departures, consult the official TSA travel checklist. A storage pouch at home is not automatically a suitable liquids bag for every journey.
7. Label Separate Kits for Each Traveler
When several people share a cupboard, personal kits prevent the familiar search for the right bag. Use a name or a simple color cue that each person recognizes.
Store each kit as a removable unit, with its own small accessories together. Avoid dividing one person’s bag and another person’s bottles across several shelves; that makes packing and unpacking harder to check.
A shared accessory box can still work for unused empty containers. Keep personal grooming items separate. Give children’s kits an appropriate accessible location while following the storage requirements of anything kept inside.
Label the edge facing the cupboard opening. A label on the underside will not help when the shelf is full.
8. Move Occasional Kits to a Travel Bin
If you travel only a few times a year, a bathroom drawer may be too valuable to dedicate to spare bags. Put clean, dry kits in a travel bin in a suitable closet instead.
Group them with packing cubes or other dry travel accessories, but give toiletry pouches their own section. Keep any products under their required storage conditions; the bag’s location does not override the product label.
Choose a bin you can lift comfortably and label its visible side. A heavy container on a high shelf is inconvenient when you want just one small wash bag. Consider separate smaller bins if a single family travel box becomes bulky.
For shelf space shared with towels and linens, our linen closet organization ideas offer a broader plan. Keep the travel section distinct so it remains easy to retrieve.
A Simple Fit Check Before Buying Organizers
Measure the bag in the condition you intend to store it: empty and folded, or lightly packed. Include its handle, zipper pulls and any rigid sides.
- Measure the opening: hinges and door edges may narrow the entrance to a cabinet.
- Test retrieval: place the bag in the proposed spot and take it out with one hand.
- Check closure: shut the drawer or door without pushing on the bag.
- Test the whole kit: include the accessory container rather than measuring the bag alone.
- Leave a maintenance path: you should be able to remove the tray or bin to wipe the shelf.
For example, a shelf opening that looks wide enough for two bags may become awkward once their handles face outward. Try the arrangement with the actual bags before ordering a divider.
The After-Trip Reset Checklist
A repeatable reset keeps your toiletry bag storage useful between journeys:
- Empty every compartment and return daily products to their normal places.
- Check for leaks, damaged seams and loose caps.
- Clean the bag and reusable accessories according to their instructions.
- Allow all components to dry completely before closing them.
- Review labels, product condition and any expiry information.
- Write a short refill note for the next trip.
- Return the dry kit to its assigned shelf, drawer or bin.
Keep the refill note specific: “replace damaged soap case” is more useful than “buy toiletries.” Before departure, review the kit again and check the current travel requirements for your route.
Frequently Asked Questions
Should I store my toiletry bag empty or packed?
Either can work. Empty storage suits occasional travel and makes inspection simple. A small maintained kit can suit frequent trips, but its products still need suitable storage conditions and a check before departure.
Where should a toiletry bag go in a small bathroom?
Use a dry drawer section or shelf where the bag fits without compression and stays clear of splashes. If the bathroom has no suitable space, move it to a dry cupboard elsewhere rather than squeezing it beside the sink.
Can I put a damp wash bag inside my suitcase?
For storage between trips, let the bag and its accessories dry completely first. Follow the care instructions and keep the bag accessible while it dries instead of sealing it inside another container.
How do I organize several toiletry bags?
Separate them by traveler or use. Stand structured bags in suitable dividers, nest a few empty flexible pouches, or use a labeled travel bin. Keep the arrangement shallow enough that you can see what you own.
Give Your Travel Kit a Reliable Home
Practical toiletry bag storage starts after unpacking. Empty and inspect the bag, follow its care instructions and choose a dry location that fits its shape. Keep loose bottles and spare pouches contained without mixing them into everyday bathroom supplies.
Start with one shelf slot or drawer section you already have. If you can retrieve the bag, inspect its contents and put it away comfortably, you have a system that can serve the next trip without adding another layer of clutter.