Kitchen serving tray storage ideas can turn awkward platters, boards, and entertaining pieces into an organized collection that is easy to reach. Instead of stacking every tray in a deep cabinet, use simple zones and dividers that protect finishes, prevent noisy shifting, and make daily serving more convenient.
Table of Contents
1. Measure Trays and Cabinets First
Begin by measuring the height, width, and depth of your largest serving trays. Check cabinet hinges, shelf lips, and plumbing that may reduce usable space. Accurate measurements help you choose a location where trays slide in and out without scraping the cabinet or blocking nearby cookware.
2. Store Trays Vertically
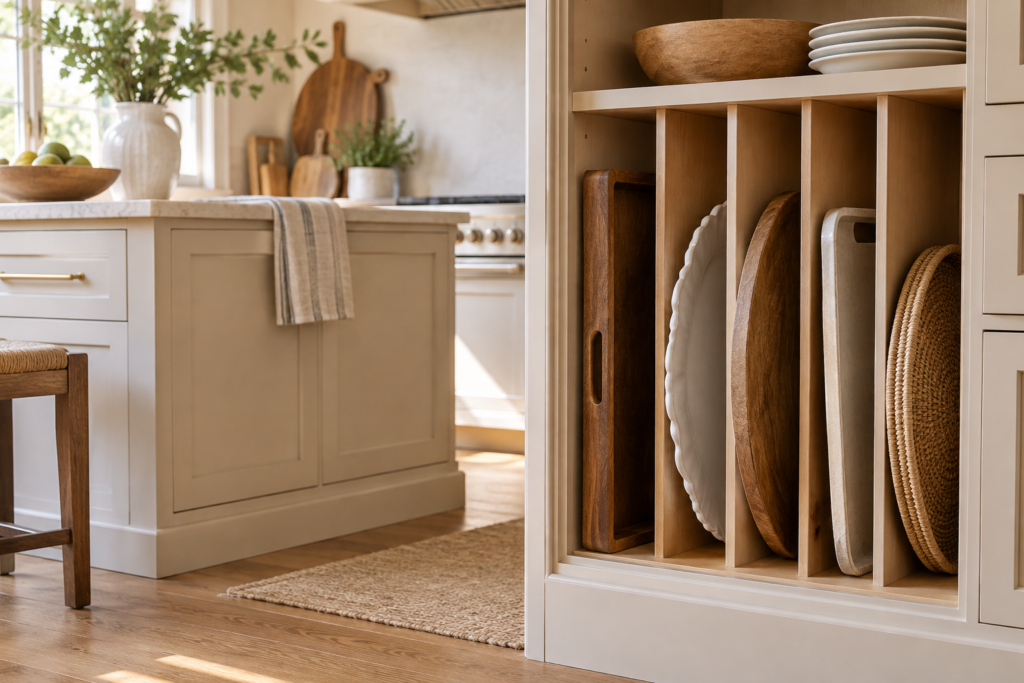
Vertical storage is one of the most practical kitchen serving tray storage ideas because it eliminates heavy stacks. Stand trays on their short or long edge in a lower cabinet. Leave enough clearance for handles and raised rims so each piece can be removed independently.
3. Add Adjustable Cabinet Dividers
Use tension dividers, wire organizers, or narrow wooden partitions to create individual slots. Place heavier wooden boards at the ends and lighter trays in the middle. Adjustable dividers let the storage system change when you add seasonal platters or replace an old serving piece.
4. Use a Cabinet Door Rack
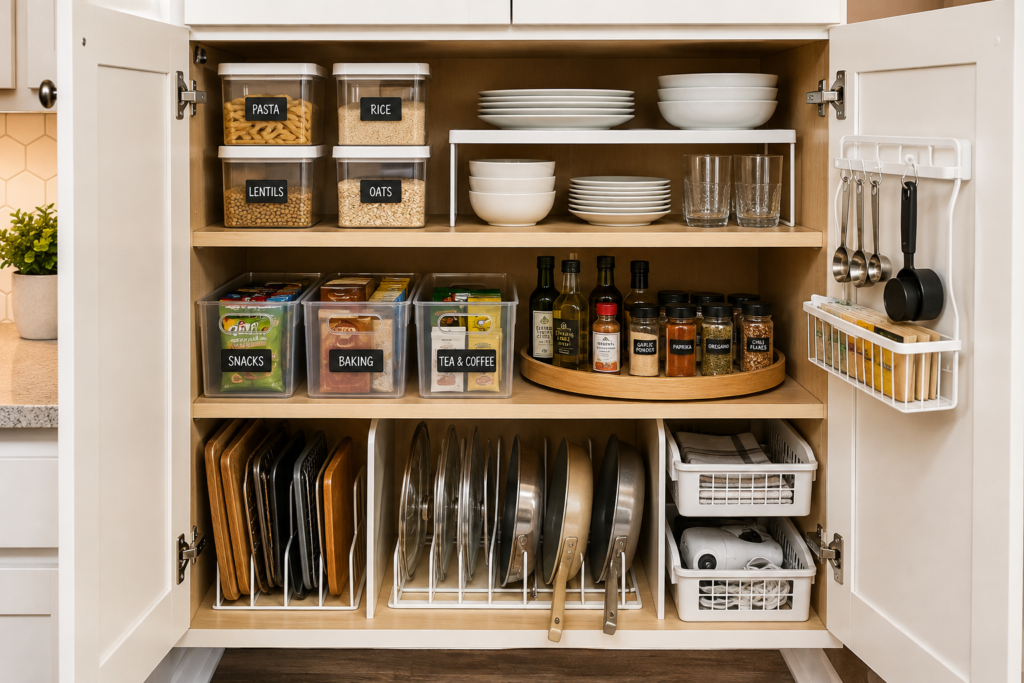
A sturdy over-door or mounted rack can hold lightweight trays, baking sheets, or placemats. Confirm that the rack does not collide with cabinet shelves when the door closes. Keep weight modest and use padded contact points to prevent scratches and rattling.
5. Create a Deep Drawer Zone
Deep drawers work well for low-profile trays when fitted with peg dividers. Arrange the trays upright rather than flat, then reserve a narrow section for trivets and serving boards. This layout keeps the collection visible and reduces bending when preparing meals.
6. Use Kitchen Island Storage
If your island has open shelves or an unused end cabinet, turn it into a serving station. Store everyday trays close to the dining area and keep matching napkins or coasters nearby. A dedicated island zone can make breakfast, snacks, and casual entertaining quicker.
7. Add a Shelf Riser
A strong shelf riser creates two horizontal levels when vertical storage is not possible. Put broad, flat trays underneath and smaller pieces above. Avoid tall stacks; three or four items per level are easier to manage and less likely to damage delicate finishes.
8. Try a Decorative Wall Rack
Attractive wooden or woven trays can double as decor in a secure wall rack. Choose a location away from the stove, sink splashes, and direct sunlight. Anchored hardware is essential, especially for solid wood or metal trays that may be heavier than they appear.
9. Protect Delicate Trays
Place felt pads, soft shelf liner, or thin fabric separators between lacquered, mirrored, or polished metal surfaces. Make sure trays are completely dry before storing them. Gentle protection prevents scratches and moisture marks while keeping special-occasion pieces ready to use.
10. Organize by Frequency of Use
Keep breakfast trays and everyday platters between waist and shoulder height. Move holiday or oversized pieces to higher shelves or a labeled pantry zone. This frequency-based system reduces unnecessary lifting and ensures the items you need most are always easy to reach.
11. Label Entertaining Sets
Small shelf labels can separate everyday, outdoor, holiday, and formal serving pieces. If trays belong with matching bowls or utensils, note the set on a removable label. Clear categories save time when preparing for guests and prevent forgotten items from disappearing at the back.
12. Maintain a Simple Routine
Return each tray to its assigned slot after cleaning and drying it. Every few months, remove the collection, wipe the cabinet, and check for unused or damaged pieces. A short maintenance routine keeps the storage practical instead of allowing another crowded stack to develop.
Safety and Practical Tips
Store the heaviest pieces low, secure wall-mounted systems to studs or suitable anchors, and avoid overloading door racks. For broader organizing guidance, explore resources from the National Association of Productivity and Organizing Professionals. You can also organize related flat items with these kitchen cutting board storage ideas.
Choose Vertical or Horizontal Storage Deliberately
Vertical dividers work well when trays have firm, straight sides and can be lifted by one edge. Horizontal stacking suits delicate, irregular, or very heavy trays, but only if frequently used pieces stay near the top. Measure the largest tray including handles before choosing either method.
Scroll sideways to read the full table.
| Method | Best for | Watch for |
|---|---|---|
| Vertical dividers | Flat serving boards and trays | Divider strength and handle clearance |
| Shallow shelf stack | Heavy or fragile trays | Too many layers create lifting work |
| Pull-out rack | Deep lower cabinets | Installation and load rating |
| High shelf | Light seasonal trays | Safe reach and stable placement |
Protect Surfaces and Make Retrieval Safe
Add thin felt or washable shelf liner between finishes that scratch. Store heavy trays below shoulder height and avoid placing them above a refrigerator or range if safe retrieval requires stretching over a hot or unstable area. Handles should face the opening whenever possible.
A Quick Capacity Rule
Leave enough space to remove one tray without dragging several others forward. If the slot is tight, reduce duplicates or move seasonal pieces. A divider should be secured so it cannot lean under the combined weight.
- Empty and measure the storage area.
- Sort trays by size, weight, and frequency.
- Place the largest tray first to test clearance.
- Add protection between delicate finishes.
- Review the zone before major hosting seasons.
Good tray storage prevents damage and makes serving easier; it should not turn a simple item into a two-handed balancing task.
Final Thoughts
The best kitchen serving tray storage ideas make every tray visible, protected, and easy to remove. Start with measurements, choose vertical slots or shallow levels, and arrange pieces by frequency. A focused cabinet, drawer, or island zone can keep both everyday meals and special gatherings running smoothly.