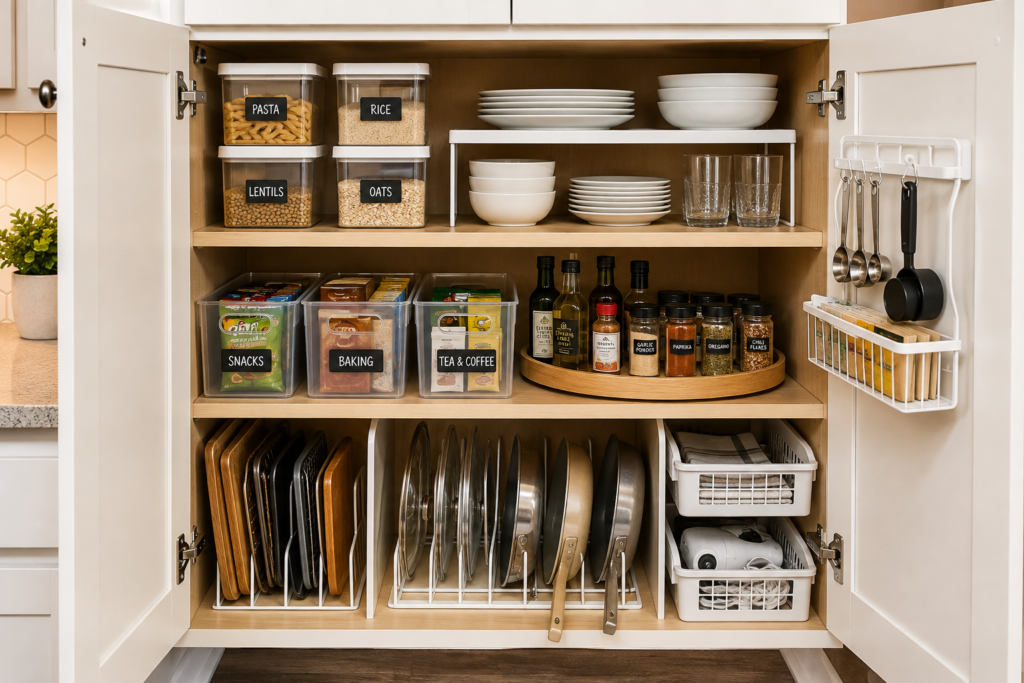
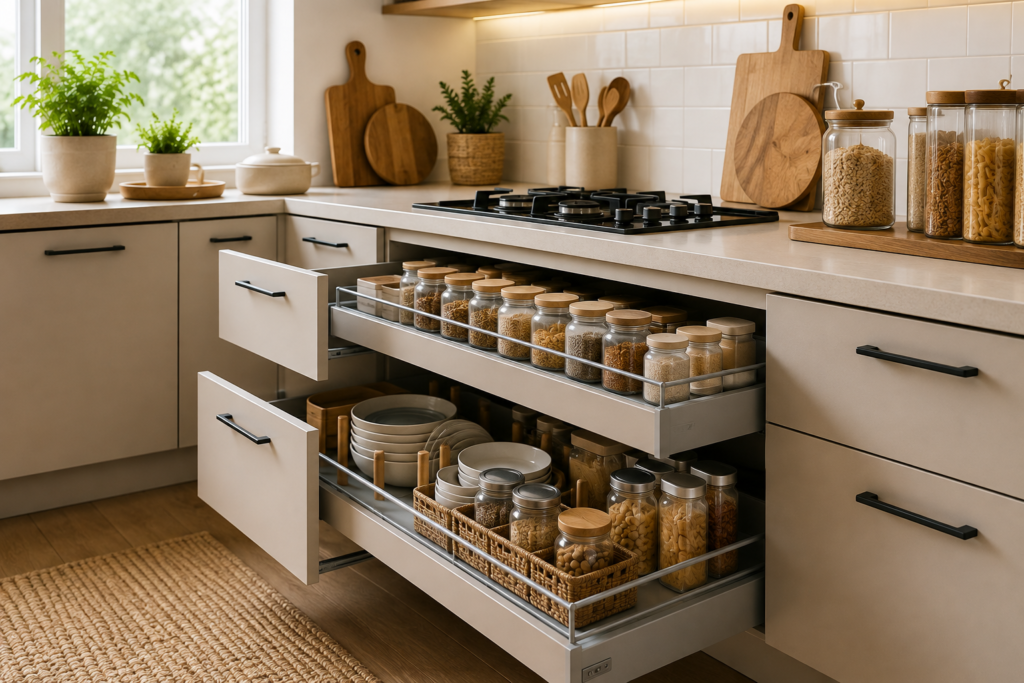
Pantry shelves work best when their spacing matches the food, cookware, and appliances stored on them. These kitchen pantry shelving ideas focus on visibility, safe access, and realistic capacity so groceries do not disappear behind one another.
Empty one section at a time, group similar items, and measure the tallest and deepest products before changing hardware. For a broader sorting system, use our pantry organization ideas alongside the shelving plan.
Table of Contents
- Adjust Shelf Heights
- Add Shallow Door Shelves
- Use Deep Shelves Carefully
- Install Pull-Out Shelves
- Add Tiered Shelf Risers
- Make Corners Accessible
- Create a Floor-Level Bulk Zone
- Keep Everyday Food at Eye Level
- Use Baskets for Loose Packages
- Label Shelf Zones
- Improve Pantry Lighting
- Review Shelf Capacity
- Planning Measurements
- Mistakes to Avoid
- Frequently Asked Questions
1. Adjust Shelf Heights
Fixed shelves often waste vertical space above cans while squeezing cereal boxes elsewhere. If the cabinet has peg holes, move shelves to create several purpose-built heights. Keep one taller opening for bottles and appliances, then use closer spacing for cans, jars, and short containers.
Measure products in their normal upright position and add enough clearance to lift them out comfortably. Avoid placing one shelf so close to the next that labels become difficult to read or hands cannot reach the back.
2. Add Shallow Door Shelves
The inside of a pantry door can hold spices, packets, wraps, or lightweight bottles. Choose shallow racks with raised fronts so items remain secure when the door moves. Confirm that the racks will not collide with interior shelves or the door frame.
Door storage changes the load on hinges. Follow the rack and door manufacturer’s limits, use suitable fasteners, and avoid heavy glass jars. Frequently used lightweight items give the best return from this narrow space.
3. Use Deep Shelves for Large Items
Deep shelves suit slow cookers, mixing bowls, and bulk packages, but small cans quickly disappear at the back. Reserve the depth for items that occupy most of it, or place related products in trays that slide forward as a group.
Do not stack heavy appliances above shoulder height. Keep weight low and confirm that the shelf material and brackets can support it. Large items should be removable without shifting fragile products first.
4. Install Pull-Out Pantry Shelves
Pull-out shelves bring the back of a deep cabinet into view and reduce forgotten food. Full-extension hardware is especially useful for lower shelves. Measure the clear opening between hinges, trim, and door hardware rather than relying only on the cabinet’s outside width.
Allow space for slide hardware and check the stated weight capacity. Tall bottles need raised sides or dividers so they do not tip when the shelf moves. Installation must keep the unit level and securely attached.
5. Add Tiered Shelf Risers
A tiered riser lets you see short cans and jars in two or three rows. Use it where shelf depth is adequate and place taller products at the back. Keep labels facing forward so stock can be checked without moving every item.
Choose a stable riser that fits fully on the shelf. Avoid narrow legs that can slip through wire shelving, and do not stack risers unless the manufacturer specifically allows it.
6. Make Pantry Corners Accessible
Corner shelves often become a collection point for rarely used food. A turntable can work for bottles and jars when its diameter fits without rubbing the walls. Wedge-shaped bins are another option for packets and baking supplies.
Leave hand clearance around the organizer and test the door opening. Avoid forcing a round turntable into a narrow corner where much of the platform becomes unusable.
7. Create a Floor-Level Bulk Zone
Store heavy bulk goods, bottled drinks, and large sealed packages on the lowest sturdy shelf. This reduces lifting risk and protects lighter shelves. Use washable trays under products that could leak, and keep food raised from the floor.
Divide the zone by type and keep purchase dates visible. Buying in bulk saves space only when the household can use the quantity before quality declines.
8. Keep Everyday Food at Eye Level
Place breakfast items, snacks, cooking staples, and frequently used ingredients between waist and eye level. Less-used serving pieces and seasonal supplies can move higher. This simple priority system reduces searching and makes it easier to notice when a staple is running low.
Adapt the height to the people using the pantry. Children’s approved snacks can occupy a safe lower zone, while breakable items and restricted products remain out of reach.
9. Use Baskets for Loose Packages
Open-front bins keep sachets, snack bags, and small baking packets together. Use one broad category per basket and avoid containers so deep that older products vanish underneath. Clear bins improve visibility; opaque baskets look calmer but need clear labels.
Choose washable materials and leave room to lift or slide the basket. Do not decant food merely for appearance when the original package contains preparation, allergen, or date information you still need.
10. Label Shelf Zones
Labels help everyone return groceries to the same area. Use flexible categories such as breakfast, baking, snacks, grains, and canned food. A label listing one exact product becomes obsolete as soon as shopping habits change.
Place labels where they remain visible when shelves are full. Review them after a few weeks and rename zones that repeatedly attract the wrong items.
11. Improve Pantry Lighting
Good lighting makes labels, dates, and spills easier to see. A pantry with a door may benefit from a properly installed ceiling or wall light, while shallow cabinets can use suitable low-profile lighting. Avoid fixtures that create heat near food or reduce shelf clearance.
For hardwired work, use a qualified professional and follow local electrical requirements. Motion activation can be convenient, but the sensor should detect a person reaching toward lower shelves.
12. Review Shelf Capacity Regularly
Every month, check dates, wipe shelves, and move older food forward. Look for bowing, loose brackets, damaged liners, or overloaded pull-outs. Correcting a small problem early protects both the food and the shelving.
If one zone always overflows, reduce the category, allocate more shelf width, or buy less at once. A successful pantry reflects normal shopping volume rather than an idealized display.
Kitchen Pantry Shelving Ideas: What to Measure
Record the clear interior width, depth, and height; shelf thickness; door opening; hinge projection; and distance between support holes. Measure the tallest bottles, widest appliance, and bins you intend to reuse.
- Check usable depth with the door closed.
- Allow finger space above bins and appliances.
- Confirm shelf and hardware weight limits.
- Include pull-out slides in width calculations.
- Keep ventilation and electrical access clear.
If cabinet storage is also crowded, coordinate the pantry with these kitchen cabinet organization ideas.
Pantry Shelving Mistakes to Avoid
Avoid equally spaced shelves that ignore product height, heavy items stored overhead, bins without labels, and organizers that block the door. Do not overload brackets or assume every shelf has the same capacity. Keep cleaning products separate from food and follow their labels.
The USDA advises storing shelf-stable foods in a cool, dry location and checking packages for damage. See its shelf-stable food guidance for practical storage information.
Frequently Asked Questions
What is a useful pantry shelf depth?
The best depth depends on the items stored. Shallow shelves improve visibility for cans and jars, while appliances and bulk packages need more depth. Measure the contents first.
Are adjustable shelves worth it?
Yes, when pantry contents change over time. Adjustable supports let you reduce wasted vertical space without rebuilding the entire unit.
How do I organize very deep pantry shelves?
Use pull-out trays for small items and reserve full depth for large products. Group related goods so the entire category can move forward together.
Where should heavy items go?
Keep heavy appliances and bulk goods on a sturdy lower shelf where they can be lifted with less reach. Confirm the shelf’s rated capacity.
Final Thoughts
The most useful kitchen pantry shelving ideas improve access rather than simply adding containers. Match shelf height and depth to real products, keep weight low, illuminate dark areas, and review the system as shopping habits change.